Scissor Lift Training
Please enter your information to begin
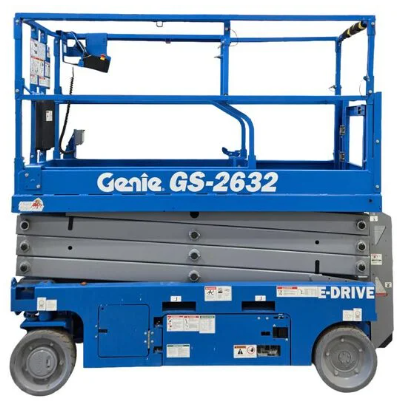
Genie GS-2632 Scissor Lift
Operator Training & Certification
ANSI/SIA A92.20 Compliant Training
📋 Section 1: Equipment Overview
Introduction
The Genie GS-2632 is an electric-powered scissor lift designed for indoor and outdoor use on firm, level surfaces. This training module will prepare you to safely operate this equipment for low-voltage installation and maintenance work.
Equipment Specifications
| Specification | Value |
|---|---|
| Model | Genie GS-2632 |
| Platform Height | 26 feet (7.92 m) |
| Working Height | 32 feet (9.75 m) |
| Platform Size | 32" W × 72" L (0.81 m × 1.83 m) |
| Platform Capacity | 500 lbs (227 kg) |
| Width | 32 inches (0.81 m) |
| Length (Stowed) | 84 inches (2.13 m) |
| Height (Stowed) | 78 inches (1.98 m) |
| Weight | 2,840 lbs (1,288 kg) |
| Power Source | 24V DC Electric (4 × 6V batteries) |
| Drive Speed (Stowed) | 3.0 mph (4.8 km/h) |
| Drive Speed (Raised) | 0.7 mph (1.1 km/h) |
| Gradeability (Stowed) | 25% (14°) |
| Turning Radius (Inside) | 0 inches (zero turn) |
Typical Applications for Low-Voltage Work
- Installing and servicing security cameras and sensors
- Running data and communication cabling
- Installing and maintaining fire alarm devices
- Audio/visual system installation
- Access control system installation
- LED lighting installation and service
- Wireless access point installation
🛡️ Section 2: Safety Requirements & Standards
Regulatory Compliance
- OSHA 1926.453: Aerial lifts safety standards
- ANSI/SIA A92.20: Design, calculations, safety requirements and test methods for MEWPs
- ANSI/SIA A92.5: Boom-supported elevating work platforms
- CSA B354.2: Self-propelled elevating work platforms (Canada)
Operator Requirements
- Complete this training program and pass the assessment
- Review the manufacturer's operator manual
- Receive on-site evaluation and authorization from supervisor
- Be physically and mentally fit to operate equipment
- Not be under the influence of drugs, alcohol, or medications that impair ability
Required Personal Protective Equipment (PPE)
- Hard Hat: ANSI Z89.1 compliant
- Safety Glasses: ANSI Z87.1 rated
- High-Visibility Vest: ANSI/ISEA 107 Class 2 or 3
- Steel-Toe Boots: ASTM F2413 rated
- Work Gloves: Appropriate for the task
- Fall Protection (if required): Full-body harness with shock-absorbing lanyard
- Guardrails are the primary fall protection on scissor lifts
- NEVER stand on guardrails, mid-rails, or toeboards
- NEVER use ladders or other devices on the platform
- Fall arrest systems may be required by employer or site-specific rules
- If using fall arrest, attach to designated anchor point on platform ONLY
Prohibited Actions
- Operate with platform load exceeding 500 lbs
- Exceed the maximum wind rating (28 mph / 12.5 m/s)
- Drive with platform elevated on slopes over 1.5°
- Use lift as a crane or to apply side loads
- Attach ropes or cables to lift for pulling/hoisting
- Modify or disable safety devices
- Operate near overhead power lines (minimum 10 feet clearance)
- Position lift where it could be struck by vehicles
- Allow untrained personnel to operate
- Use damaged or malfunctioning equipment
Site Safety Assessment
Before moving or operating the lift, assess the work area for:
- Overhead Hazards: Power lines, pipes, ductwork, beams, ceiling height
- Ground Conditions: Holes, drop-offs, slopes, debris, wet/icy surfaces
- Lateral Hazards: Walls, equipment, protruding objects, vehicle traffic
- Environmental: Wind speed, weather conditions, visibility
- Clearances: Adequate space for operation and emergency descent
🔍 Section 3: Pre-Operation Inspection
A thorough pre-operation inspection must be performed at the start of each shift or whenever the lift changes operators. This inspection ensures the equipment is safe to operate.
Visual Inspection Checklist
Complete all items before operation:
Function Test
After visual inspection, perform the following function tests:
- Platform Controls: Test all platform control functions
- Platform Up/Down
- Drive forward/reverse
- Steering left/right
- Horn
- Ground Controls: Test emergency lowering function from ground station
- Emergency Stop: Push emergency stop button and verify all functions stop
- Safety Devices: Test tilt sensor and pothole protection (if equipped)
- Brakes: Verify lift holds position when not in motion
🎮 Section 4: Controls & Operation
Control Locations
The GS-2632 has two control stations:
- Platform Controls: Primary operating station on the platform
- Ground Controls: Emergency descent controls at base
Key Switch
3 positions: OFF, PLATFORM, GROUND. Must be in PLATFORM position to operate from platform.
Platform Up/Down
Toggle switch or button to raise and lower the platform. Hold to operate.
Drive Control
Joystick or lever controls direction and speed. Push forward to drive forward, pull back to reverse.
Steering
Left/right control built into drive joystick or separate steering wheel.
Horn
Audible warning device. Sound before moving.
Emergency Stop
Red mushroom button. Push to stop all functions immediately. Pull to reset.
Battery Gauge
Indicates battery charge level. Return to charging when low.
Hour Meter
Records operating hours for maintenance scheduling.
Operating Procedures
Starting the Lift
- Complete pre-operation inspection
- Ensure platform is fully lowered
- Check that area around lift is clear
- Enter platform through entry gate
- Close and latch entry gate
- Turn key switch to PLATFORM position
- Check that emergency stop button is pulled out (reset)
Raising the Platform
- Verify overhead clearance and check for hazards
- Ensure all personnel are clear of lift
- Hold UP button/switch continuously
- Monitor surroundings during ascent
- Stop at desired height by releasing control
- Verify platform is stable before working
Driving the Lift
- Sound horn before moving
- Check path of travel for obstacles and hazards
- Look in direction of travel
- Move drive control slowly to start
- Keep platform aligned with direction of travel
- Watch for overhead clearance continuously
- Stop if any unsafe condition is observed
Steering and Maneuvering
- Wide Turns: The GS-2632 has zero inside turning radius but rear end swings out
- Tight Spaces: Approach slowly and check clearances on all sides
- Doorways: Ensure adequate clearance (32" width plus margins)
- Reversing: Look behind before and during reverse travel
Lowering the Platform
- Remove all tools and materials from guardrails
- Ensure area below is clear
- Hold DOWN button/switch continuously
- Monitor descent path
- Release control when platform reaches ground level
Shutting Down
- Lower platform completely
- Park on level surface
- Turn key switch to OFF position
- Remove key (if required by site)
- Exit platform and close entry gate
- Connect to charger if needed
Emergency Descent (Ground Controls)
- Locate ground control box at base of lift
- Turn key switch to GROUND position
- Communicate with platform occupant if possible
- Use DOWN button to lower platform
- Monitor platform descent
- Tag lift "OUT OF SERVICE" and report malfunction
🚨 Section 5: Emergency Procedures
Power Failure
If the lift loses power while elevated:
- Remain calm and stay on the platform
- Do NOT attempt to climb down
- Check battery gauge - may be discharged
- Check emergency stop button - ensure it's pulled out (reset)
- Try platform controls again
- If controls don't work, signal for help
- Ground personnel can use emergency descent controls
- If emergency descent fails, call for rescue (fire department)
Tilt Alarm Activation
If tilt alarm sounds and functions stop:
- Do NOT attempt to continue operation
- Check if platform is on slope or uneven surface
- If elevated, use emergency descent from ground controls
- Once lowered, move to level surface
- If alarm persists on level ground, tag "OUT OF SERVICE"
- Report malfunction immediately
Equipment Malfunction
If you notice any abnormal operation:
- Stop operation immediately
- Lower platform if safe to do so
- Turn key switch to OFF
- Push emergency stop button
- Place "OUT OF SERVICE" tag on controls
- Report issue to supervisor with details
- Do not attempt repairs unless qualified
Tip-Over (Extremely Rare)
- Hold on to guardrails - DO NOT JUMP
- Stay inside the platform
- After lift settles, assess for injuries
- If able, turn key switch to OFF
- Call for emergency assistance (911)
- Exit only when safe and rescue personnel approve
Fire or Smoke
- Lower platform immediately if safe
- Evacuate area
- Call 911
- Use fire extinguisher only if fire is very small and you're trained
- Do not return to lift until fire department clears area
Entrapment
If you or equipment becomes entrapped:
- Stop all functions immediately (emergency stop if needed)
- Assess the situation - do not panic
- If able to free safely by lowering or repositioning, do so carefully
- If stuck, signal for help
- Do NOT force controls or apply excessive force
- Wait for qualified assistance
Medical Emergency on Platform
- Call 911 immediately
- Lower platform to ground level if operator is able
- If operator is incapacitated, use ground controls to lower
- Provide first aid if trained
- Ensure AED is available if needed
- Keep access clear for emergency responders
Weather Emergencies
- Lightning: Lower platform and evacuate immediately at first sign
- High Winds: If winds exceed 28 mph (12.5 m/s), cease operations
- Severe Weather: Monitor weather forecasts and lower platform before conditions deteriorate
Certification Assessment
15 Questions • 80% Required to Pass